
Kitchen Makeover
Hey friends, thank you for following me as I moved my blog onto this new platform!
If you want first hand of all the goodies I plan on sharing please sign up HERE to our newsletter so you don’t miss a thing! You will also receive a free printable designed by me!
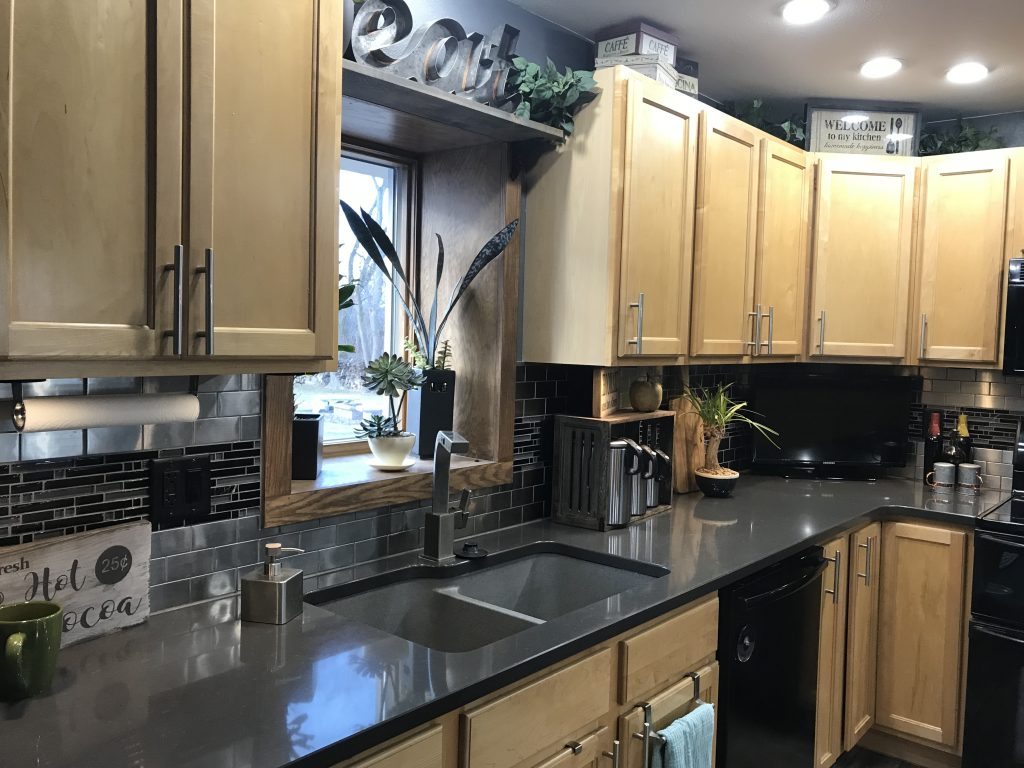
As many of you know hubs and I decided to update our kitchen since it has been 18 years since we installed our maple cabinets and floors. They really were still in great condition but natural maple color is just not the “in thing” anymore so working on a budget paint was our option. Plus, I really wanted a more modern farmhouse design.
Here are the old floors!
New floors were the biggest expense but yet so affordable when buying from Lowes. Here are a few BEFORE pics just so you get an idea of the color change.
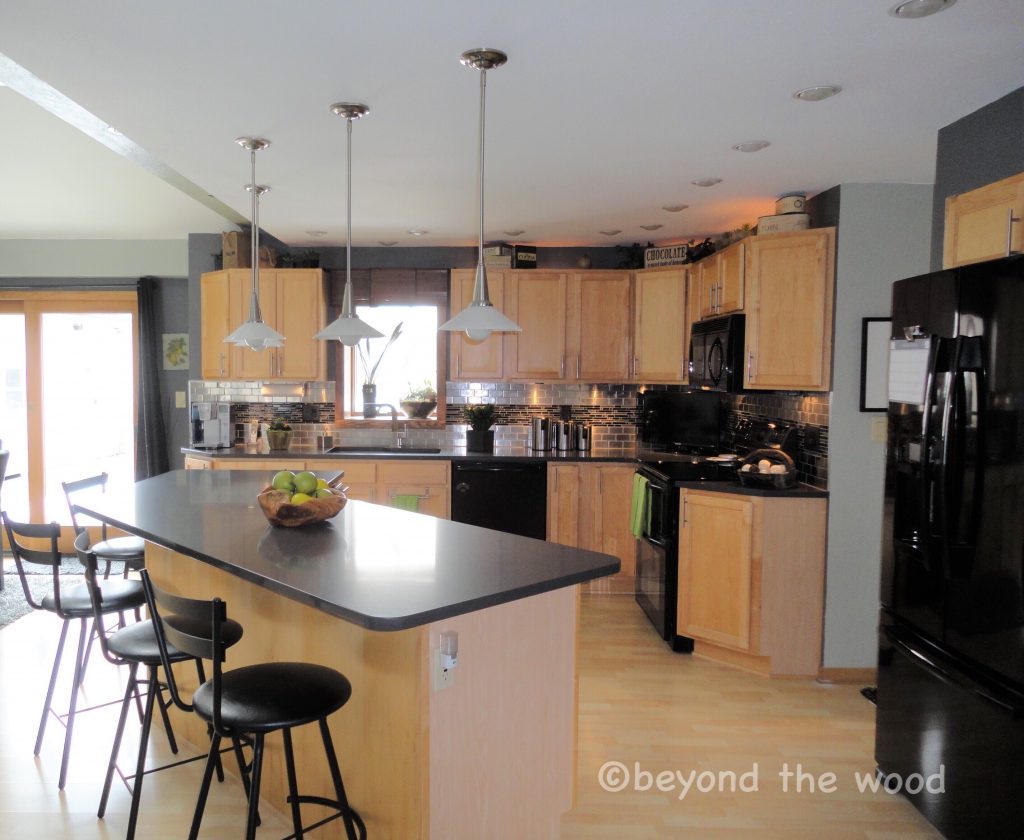

As you can see we also had maple floors. So in December we started this long project with replacing the floors first since that would be a winter project for hubs.
We knew the cabinets would be done next but thought we would wait until spring for them. So here are some photos with the new floors. These are the same floors I have in my office so I already knew I would love them.
New floors!
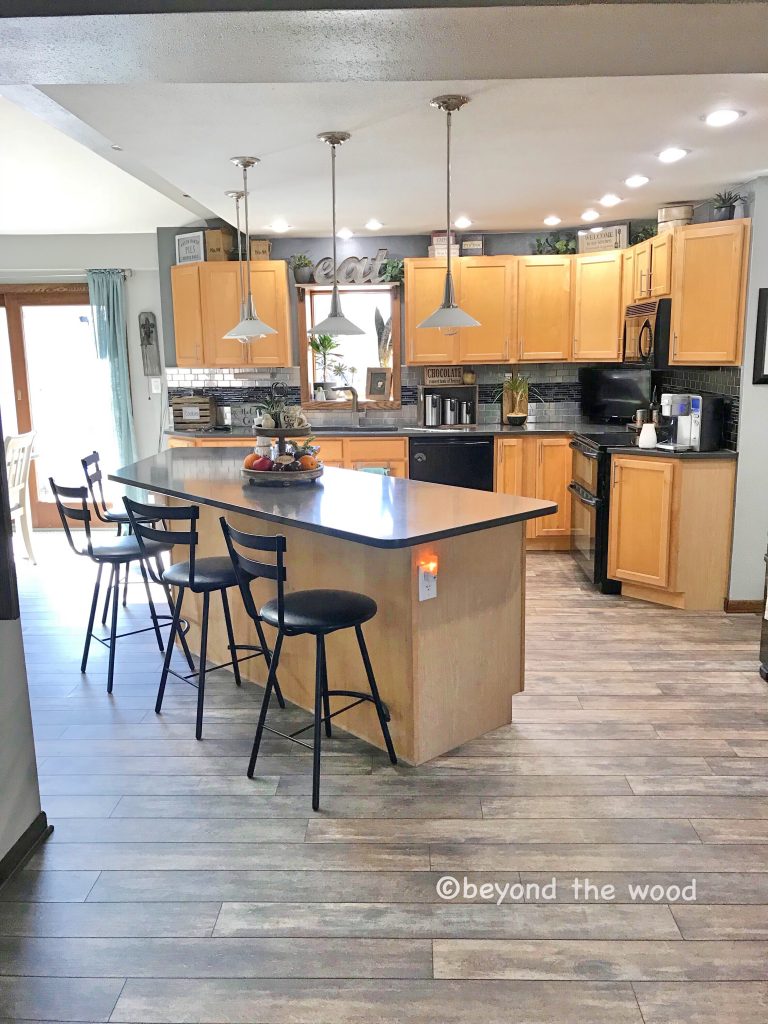
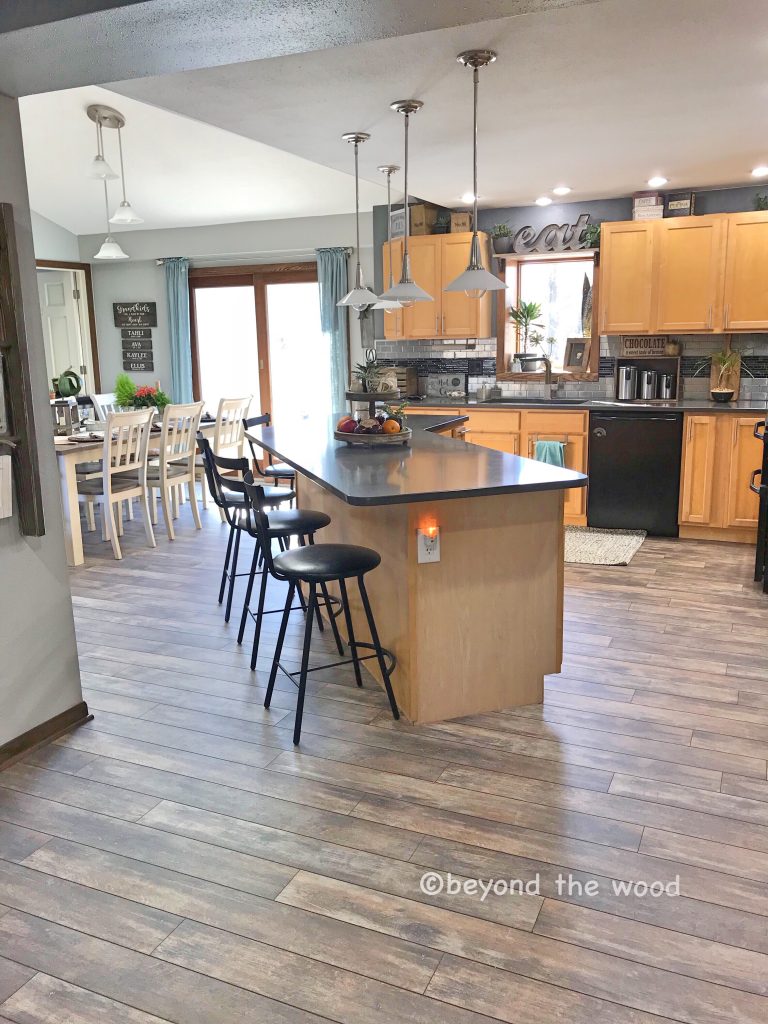
Oh I sure do love the new floors but then realized they did not go with the cabinets like I wanted them to and had to get them cabinets done sooner rather than later.
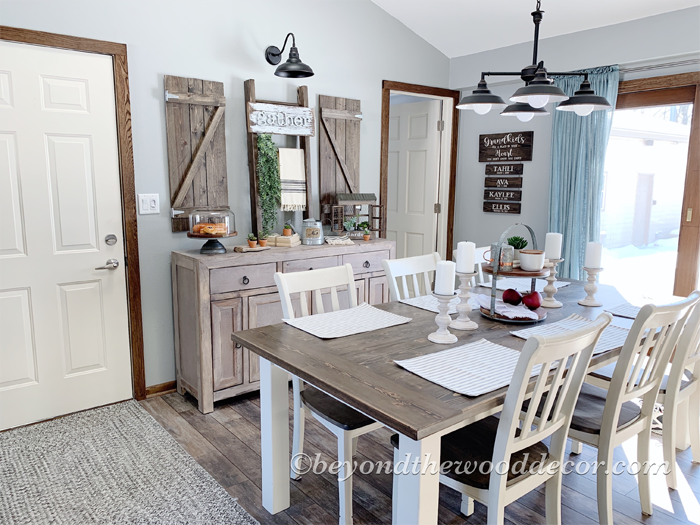
I really wanted them to match my table that hubs built last year. The island also was just so blah now and I really wanted ship-lap with a nice chunky look. Here it is before:
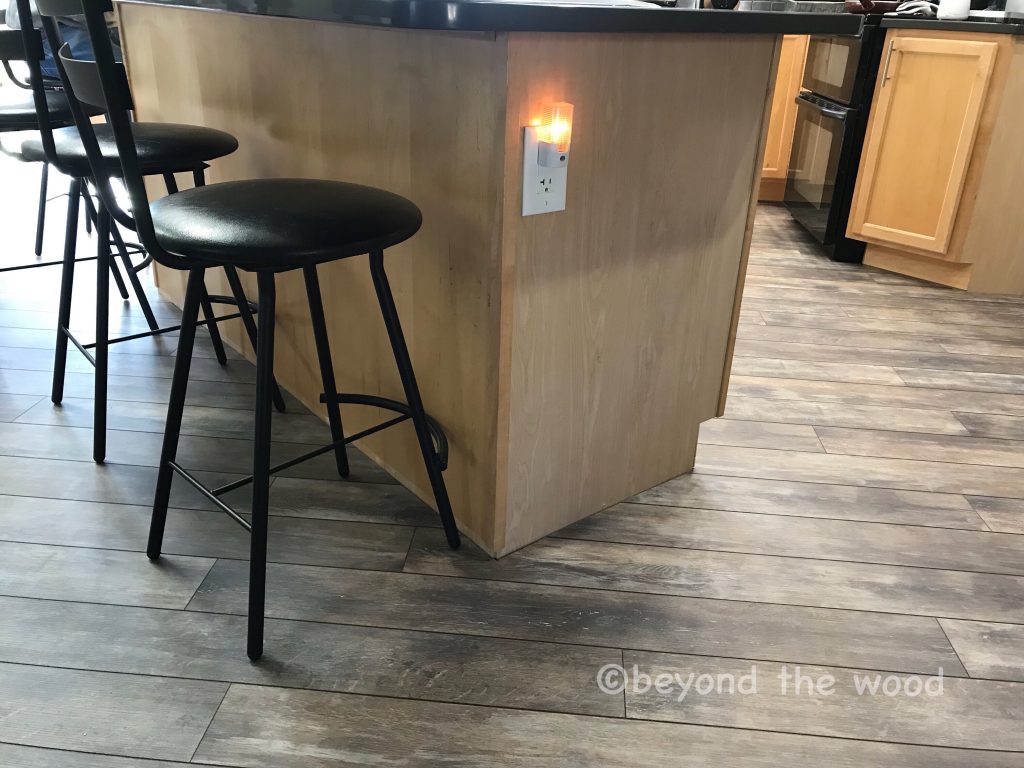
Island makeover was next!
So we started one weekend with just the island. Here is a photo once we ripped off the boards to get down to what was underneath.
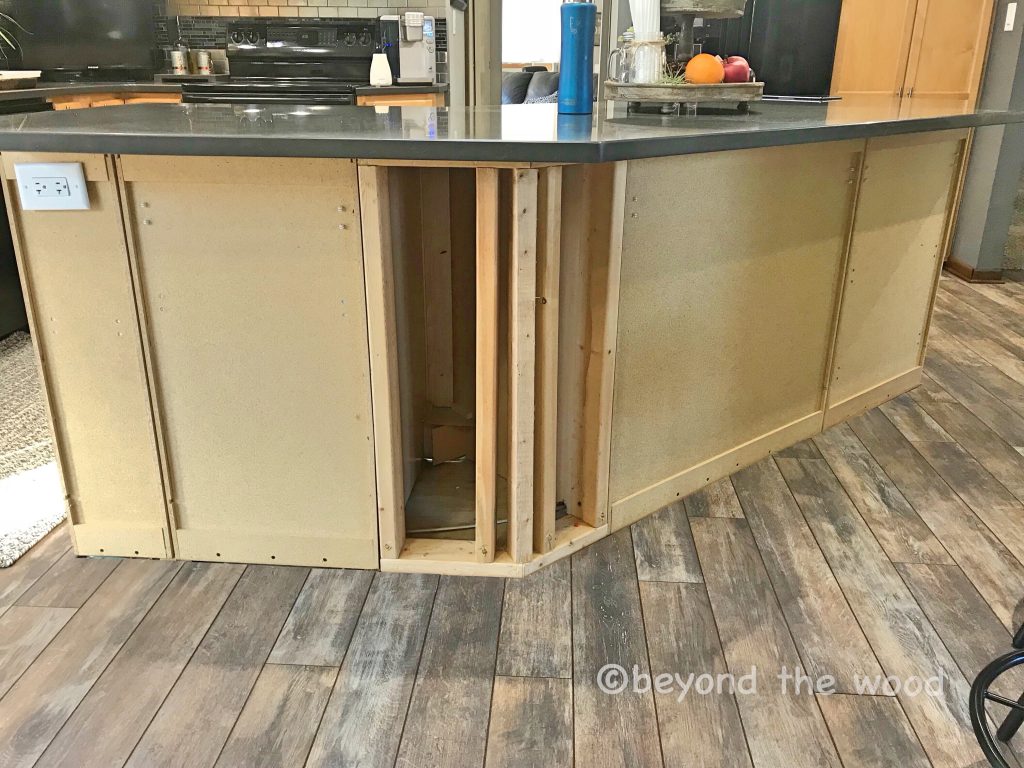
After measuring, and getting our supplies list together off to the store hubs went to get the wood to make this vision come to life. Hubs was still on board because it was still winter and he had no other projects going on so he hit it hard and got the back of the island done in one weekend.
WOW it looked amazing and made us not stop there. We proceeded to do the cabinets on the other side of the island and we got even more excited to get the rest of the kitchen done.
So while he was at work during the week I removed all the fronts of the cabinets and drawers and removed all the hardware. If you take on this project I highly recommend removing all that and labeling each one with a number or letter matching where it goes in the kitchen. This makes it much easier to put back together. So in the hole where the hinge went I put a number that matched with the cabinet where I had the same number on a piece of painters tape in the cabinet.
We then covered that number on the door with a piece of tape since it would then be painted over. This worked super well to keep everything straight. I also kept the hardware organized in containers. (ignore the syringe in the photo, lol. My dog is diabetic and she gets insulin twice a day and I realized I didn’t toss that one and it got in the photo)

The next step was cleaning everything with a de-greaser. Be prepared the cabinets by the stove will have more grease on the tops of them that is missed with your normal cleaning because you don’t see the tops of them near the ceiling. Yikes mine were not pretty and I felt like a terrible housekeeper and vow now to clean them on a weekly basis. I mean seriously, grease buildup just happens but if you don’t keep up with it it will be that much harder to get off.
Thankfully mine were not horrible as I did clean them every couple of months and the orange de-greaser I used worked AMAZING…..I just sprayed it on and it wiped right off. So once they were all cleaned off to the shop they went for sanding.
We chose to sand them slightly so the primer and paint had a nice surface to grab. I used 220 grit sandpaper with my electric sander and it really went quick. Then I cleaned them off well with a damp rag to get off any dust and used a tack pad to remove anything that was missed. Hubs had the tack pads for when he paints cars and they worked awesome. But you can get tack cloths at any hardware store but don’t get the sticky kind. I initially bought one of them and it was so sticky it made the cabinet sticky which was not good.
I did all this one week while hubs was at work so by the weekend he could just spray them while I did the cabinets. He did give them a final wipe with the tack pad before he painted just to make sure there was no dust on them.
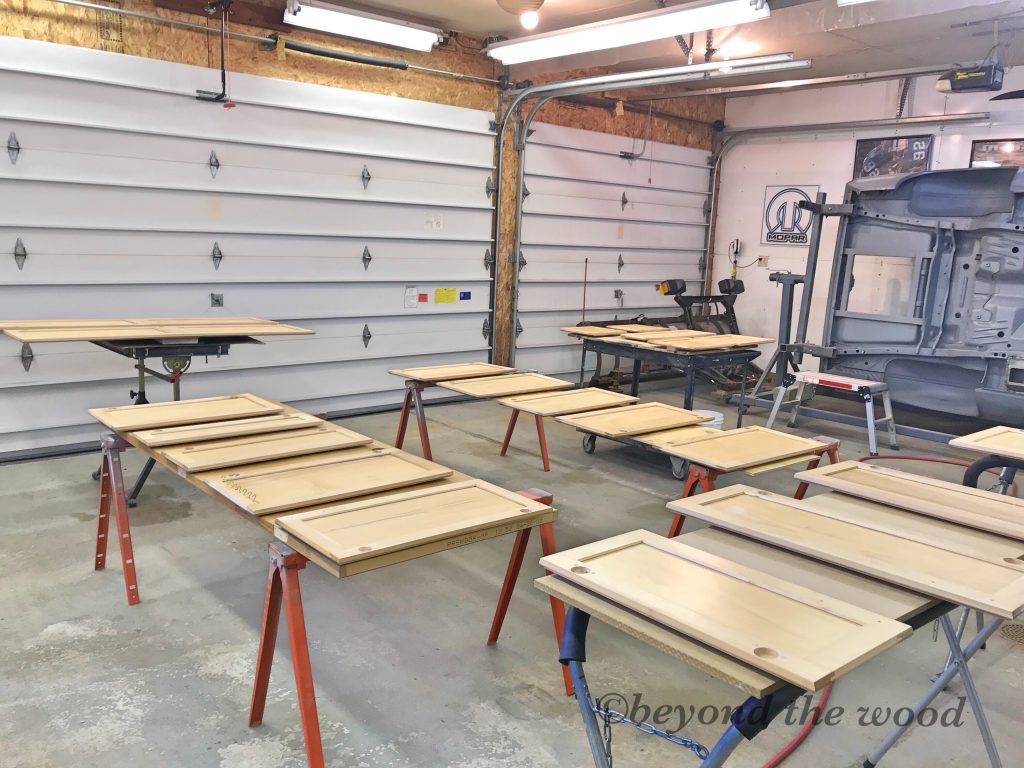
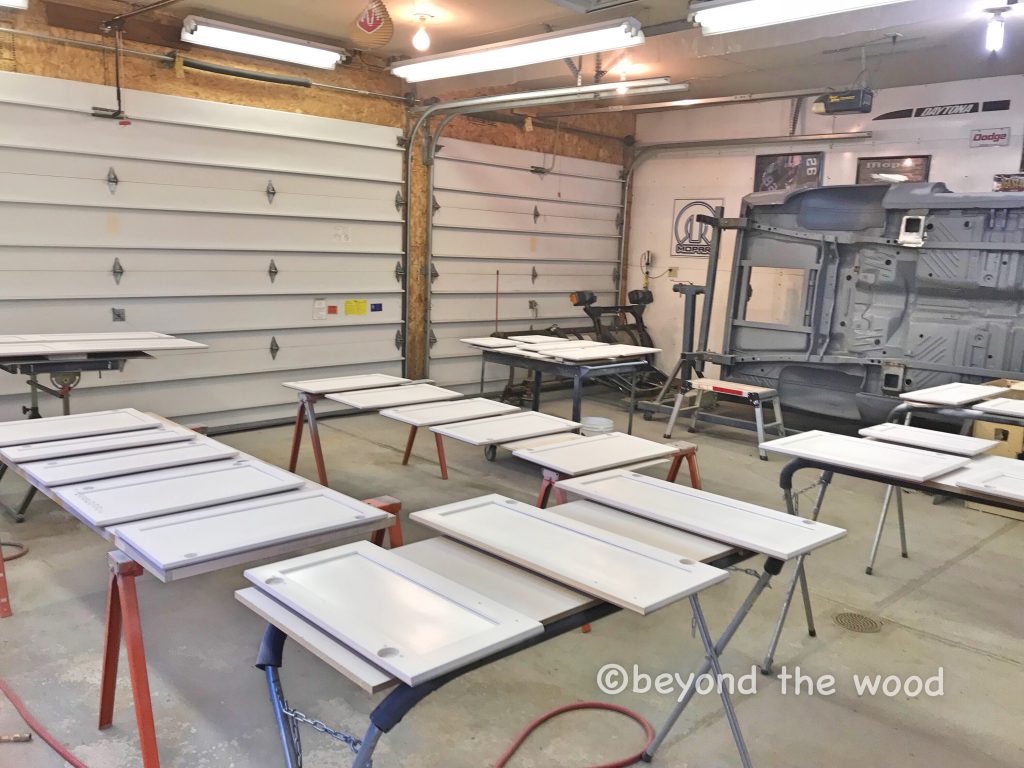
So here is a photo of them in his shop which worked out wonderful. His shop is huge and heated so space for spraying and drying was no issue. Nor did we have to worry about being outdoors and have all the dust and pollen in the air get into the paint. If you don’t have a big enough space in the garage a basement would work just fine for this as well as long as you are not on carpet. You may need to cover it if you do for any over spray you may get but this spray gun has virtually minimal over spray. We even used the sprayer on the island in the kitchen and it worked great.
Primer first!
We started with this primer. I heard from many professionals in this line of work this works wonderful so I decided to use it. You can get this at any hardware store.
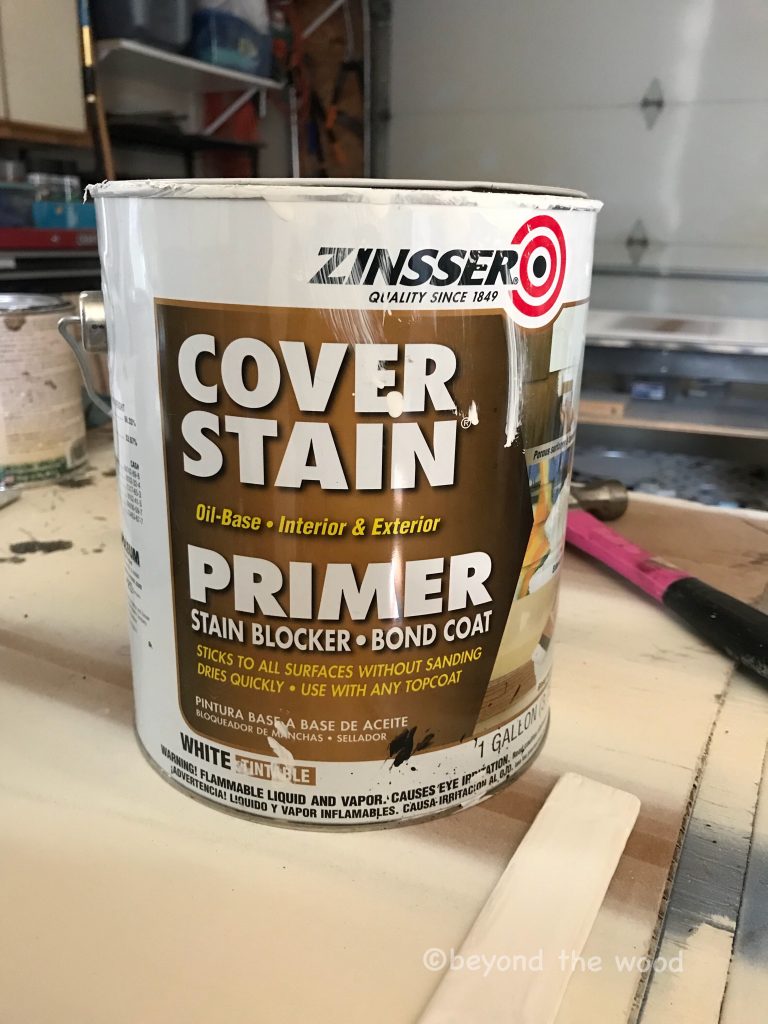
We had a paint sprayer but decided to buy another one specific for this project. So this is the one I got from Amazon and I highly recommend it. Works with electricity so you don’t need an air compressor like you do with my other sprayer. I also used that to paint many doors in our home.
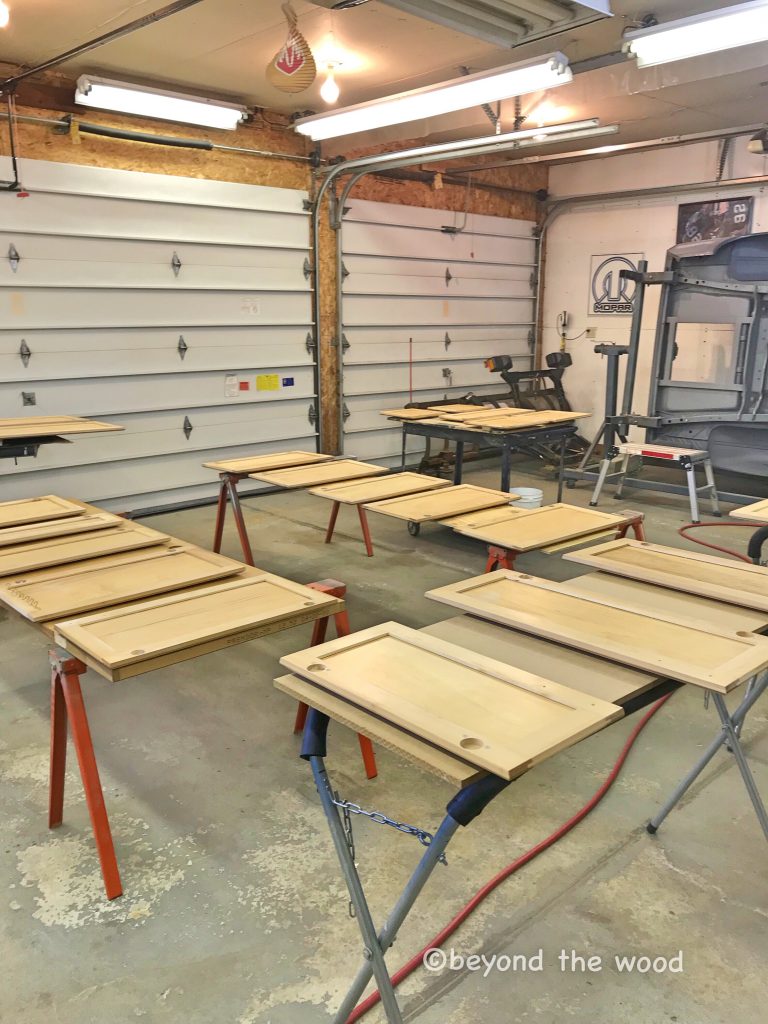
Biggest tip with that sprayer is to be sure to clean it after each use and you will get a long life out of it. Here are some photos after the primer was applied:

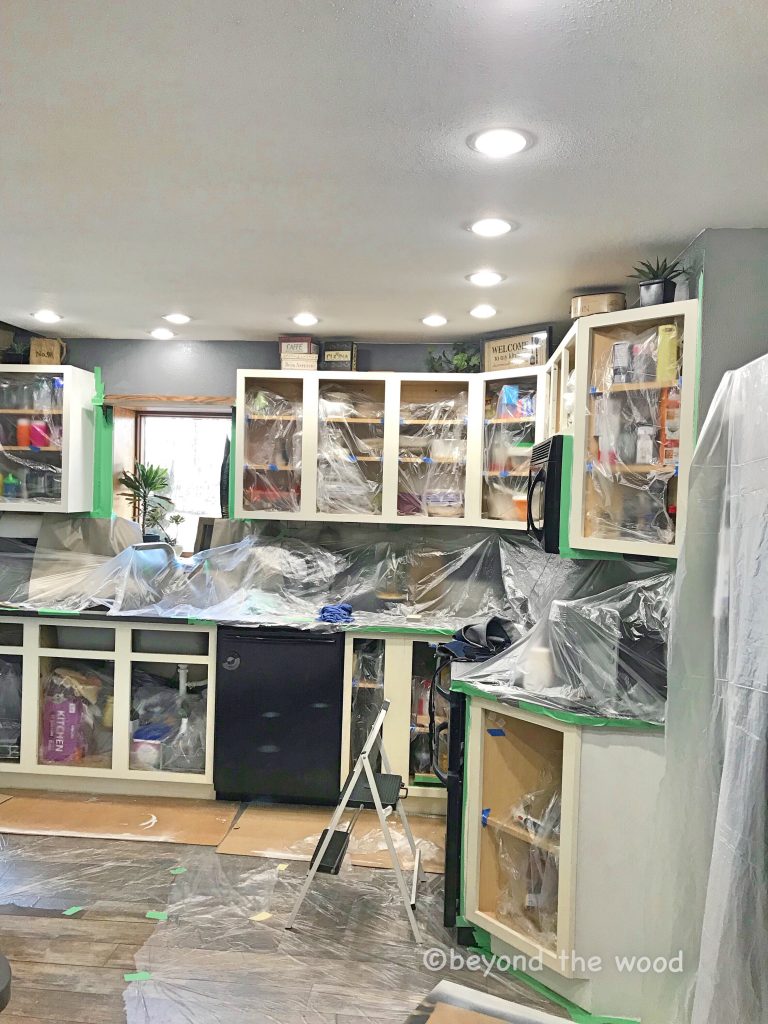
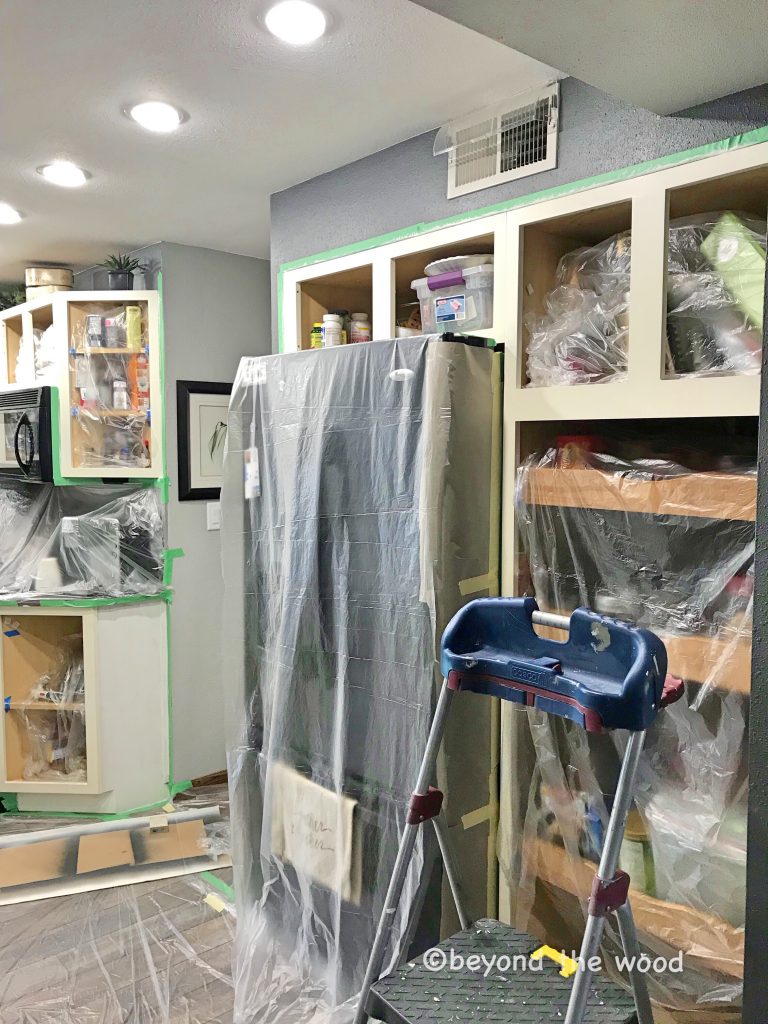
While hubs was in the shop doing them I was in the kitchen doing the cabinets. I decided not to empty them and instead just cover with plastic. I also made sure to cover the floor and counters really well and tape off as needed.
I used the same steps with the cabinets. Cleaned them with a de-greaser and then sanded them with just a piece of sandpaper. I did that all by hand to avoid too much dust in the kitchen and again used 220 grit sandpaper.
Here are some photos of my kitchen during the process. As you can imagine I was very anxious to get it done because I do not do well when my house looks like a tornado went through it. lol.
Here are some tips:
~Don’t skimp on cheap brushes. I did use a cheaper brush on the primer but then found I needed to sand much more to get that really smooth surface for the paint.
~Be sure to sand lightly between coats and clean off that dust well. I did two coats of primer and it worked out well.
Onto the Paint!
I did a ton of research on this as well as talked to many professionals in this field and it was recommended to use Benjamin Moore Advance Paint.
I went with Satin because I don’t like much shine but yet wanted to be able to clean them well. This paint is self leveling and hardens over time. I had it mixed to the same color as my table so it would all match. I was extremely happy with the paint and working with it in the sprayer you did have to thin it with water which was very easy to do.
Follow the instructions in the sprayer as to how thin it needs to be. As for applying it to the cabinets here is where you should NOT buy a cheap brush. It makes a world of difference. I went with this Purdy brush which has Nylon/Chinex bristles and I am telling you it went on like silk and has a mirror like finish. This brush with the self leveling paint will give you NO brush marks and a professional looking finish.
The disadvantage with this paint is you need to let it dry for 16 hours between coats. Even though it is dry to touch in a short time they say it really needs to harden before the next coat and will continue to harden over time.
So we did primer on a Saturday two coats. Then that dried quick enough so we did one coat of the paint and let that dry until the next day. Once dried you will then sand oh so lightly with 320 or higher sand paper or even a steel wool before applying another coat of paint. Hubs did end up doing three coats on the door and drawer fronts but I just did two on the cabinets.
A great advantage to this product is no clear coat is needed. The paint has a hardening finish in it so that was awesome. YAY, because I did not want to do another step. We actually let it dry and harden another 2 days. Just because I was busy working and so was hubs so we waited to put the hardware back on and then put everything back together.
But we also then decided to buy slow close hinges instead of the ones we had so that was an unexpected expense but after 18 years I think they needed the upgrade. For sure no regrets on getting them as it is so nice to close all on their own without slamming.
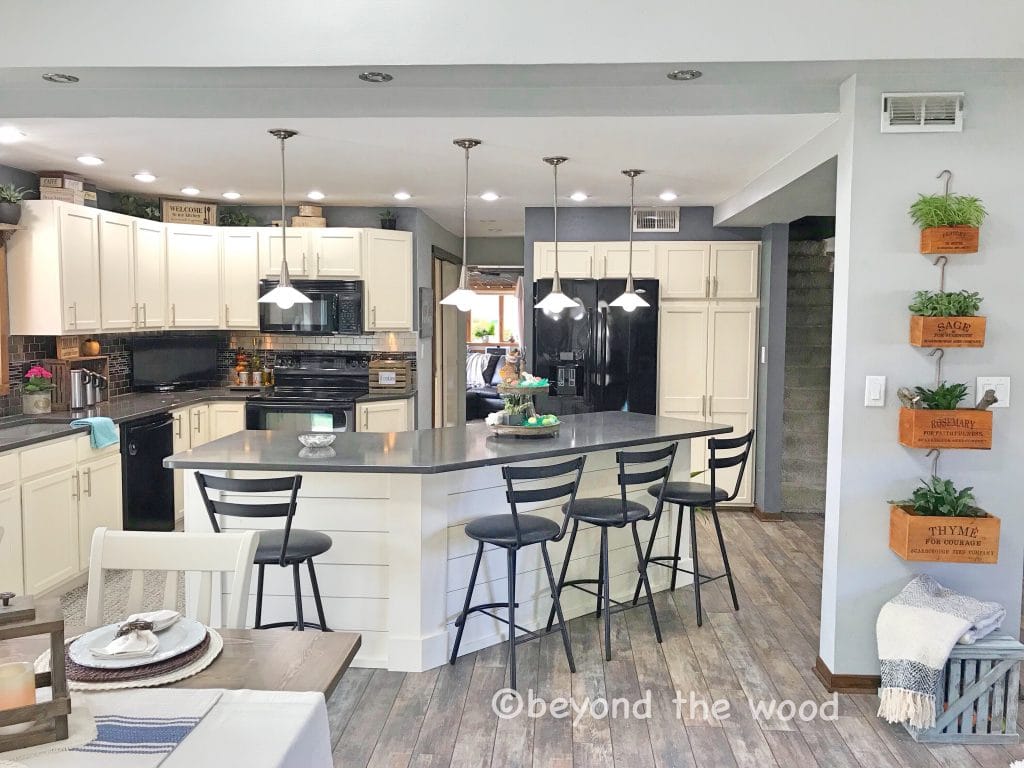
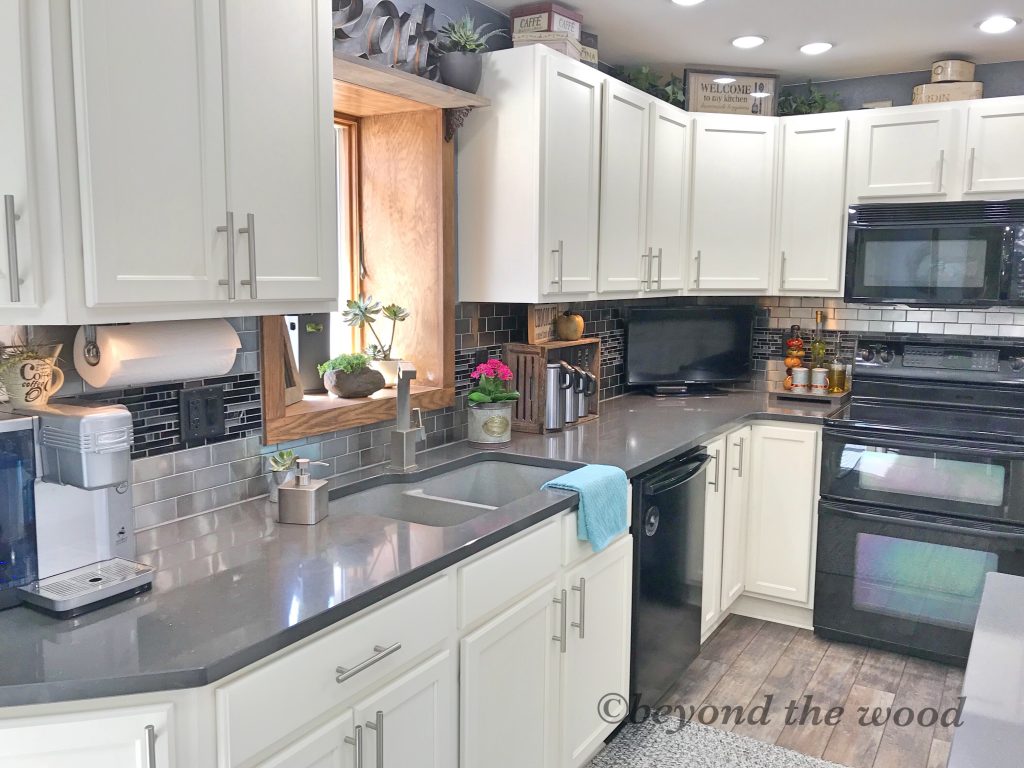
Here is the end result and WOW, what a difference it made. It has been just a couple of weeks now and I could not be happier. It was a very time-consuming project but well worth it in the end. I am also so pleased with the island. Ship-lap and chunky trim is so fantastic!
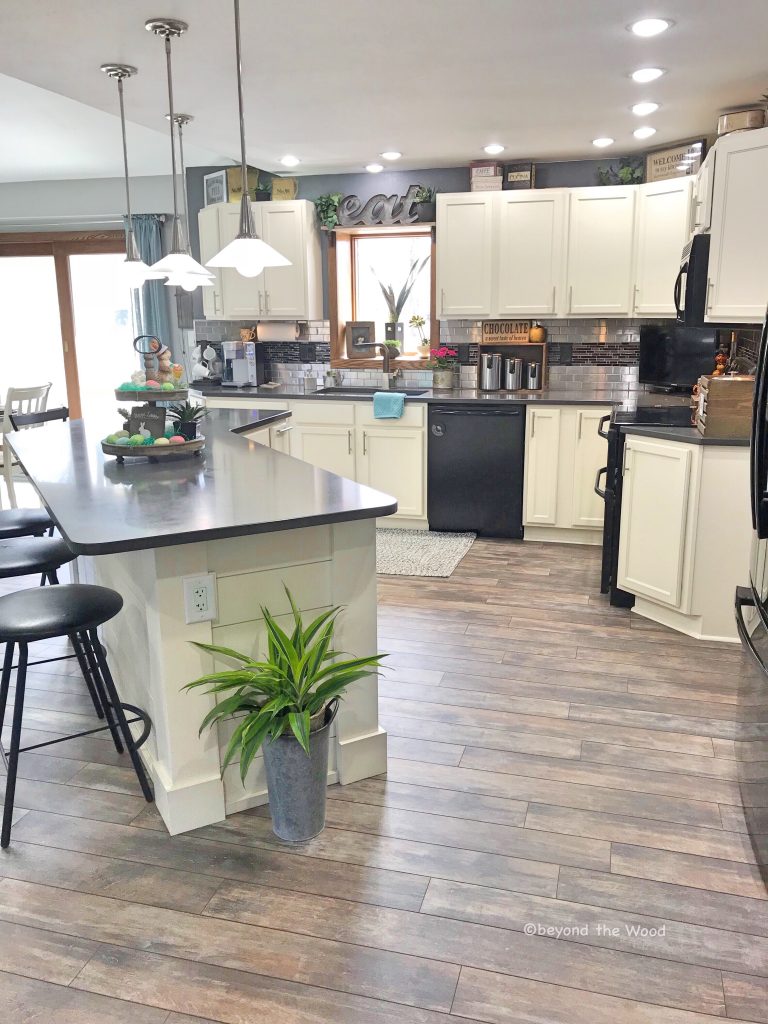


And here is a pic of the newly ship-lap chunky island. Now I want to do a wall with this, lol.

I mean seriously look at the before and after side by side…what a difference some paint and labor of love can make.
So if you ever wanted to do this don’t be afraid. I really wish I would have done it years ago but hubs was never on board. He was this time and is also very happy with the end result.

Of course, now that we are done with this I find myself needing different lights. So we will slowly update them as well. In another post this week I will share one that we already changed out above the table. The island will be next!
So check back often I have so many projects to share. Because of Facebook algorithm I know many do not see my posts so make sure you follow me here and you will automatically get an email when a new post is up.
Thanks for stopping by and if you have any questions feel free to ask. Enjoy the rest of your night!
(Side note….to see my 1 year review follow this link). Painted Kitchen Cabinets 1 Year Review
![]()


Looks amazing, your home is beautiful Tammy!!
awww thank you Trish I appreciate it.
looks gorgeous, may I ask what type of floor, brand color it is? I love it(all of the kitchen)
Margaret, it is a laminate floor from Lowes. I will see if I can find it on there sight as we did buy it last August. Our last floor was also laminate and was still in great condition so we needed something ona budget and laminate was cheaper than hardwood so that’s the route we went. Thank you for your kind words.
Wow Tammy your kitchen turned out beautiful!! Wish i had your talent!
Oh thank you Mina, but seriously anybody could paint them. It is just a slow process.
Love Love It. Great Job
Thank you Judi, we are very pleased with it.
New updates ❤️
Thank you Jean! Projects are always fun for change!
Wow Tammy!…Such Beautiful improvements…Everything you and Rick do is Perfection!!!
Such detailed perfection!! You and Rick are such an awesome teem 🙂 So Impressed!!
Oh Beverlee thank you for your kind words I appreciate it!
Pingback: Updated Chandelier | Beyond the Wood
This looks awesome, Tammy! Do you mind sharing what color you chose for your table/cabinets? I am looking to start my kitchen makeover soon and love your color choice.
Hi Abby, thank you so much. We certainly are loving it. I am happy to share the paint color but it is not a standard color. It was custom made because I wanted something with real warm tones. I did not want pure white nor anything with yellow tones. So it was custom made. I will email you the code from the can. If you are local you are welcome to come see it in person since pictures do not do it justice.
Beautiful job… amazing transformation… I’m struggling with all my paint samples I bring home.. my offwhite cream is showing up too white for me… different light shows it all different colors during the day and night…
Thank you and you are correct it is hard picking paint and usually takes me many months. I do recommend painting a few colors either on a separate piece of wood and set in the kitchen or on the inside of a cabinet door so you can really decide. My color was specially mixed because I was matching a cream on another piece. But if you want those numbers feel free to email me and I can send a snapshot of the color code back to you.