
Just like that its Saturday already. Did you all have a great week? This week kinda kicked my butt. I had so much planned to do but then I also had so many appointments and other commitments I didn’t get to everything that needed to be done. I am sure we all have weeks like that, right?
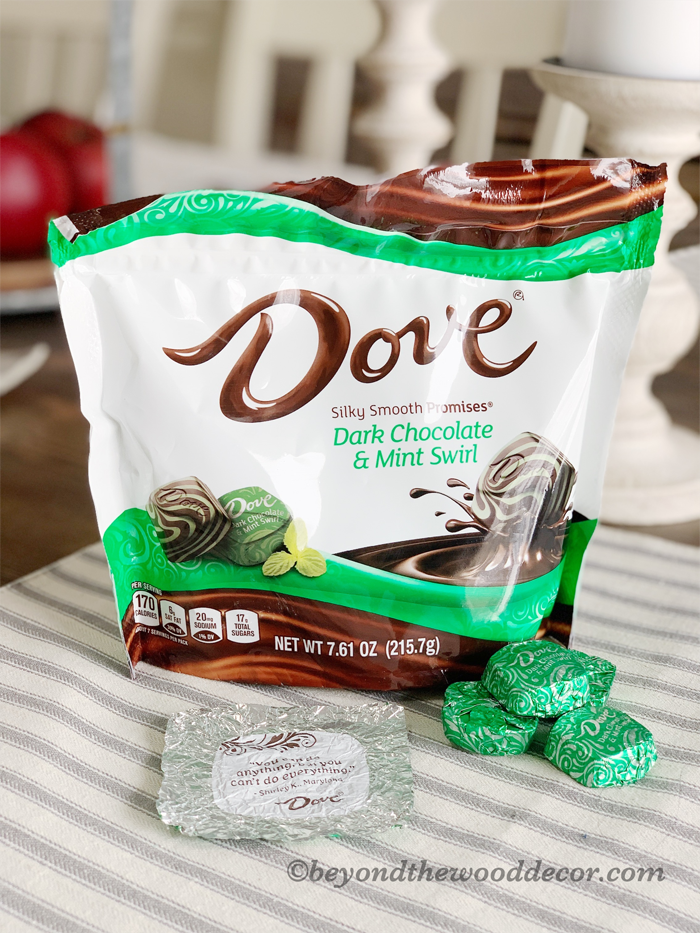
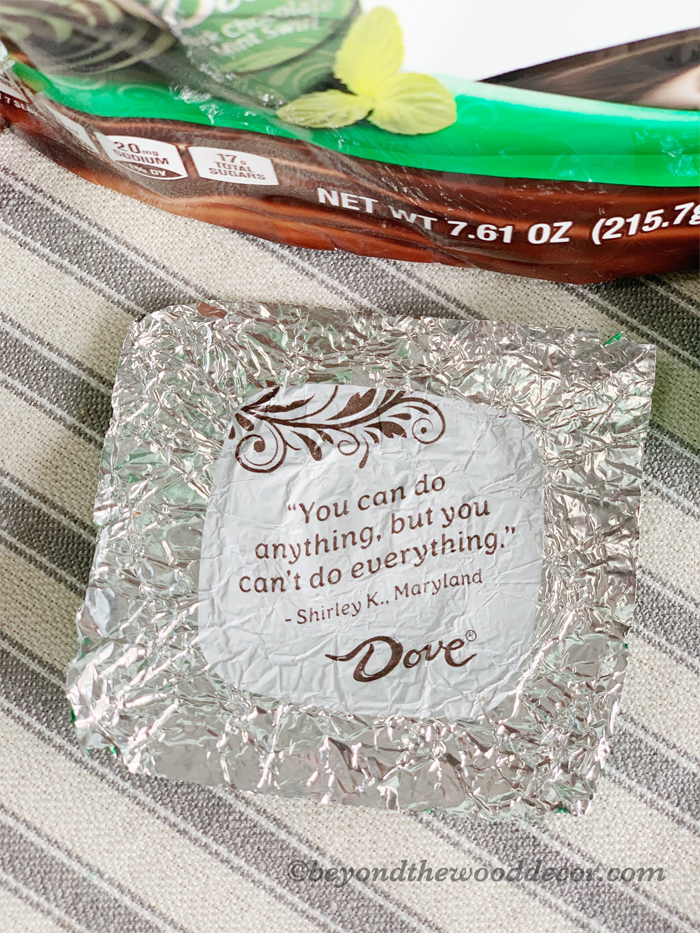
Hubs was at the store the other day and he picked up a package of my favorite Dove chocolates. (these seriously are the best) I love them and I also love reading the message inside the wrapper. This one I got right before I was writing this blog post and wow, it resignated with me totally, and the week I was having.
What a great quote, hey! “You can do anything, but you can’t do everything” ~ Shirley K., Maryland. I think we all need to remember that from time to time! It certainly made me feel better about not accomplishing all that I had on my list.
On that note even you can do this DIY so let’s move onto it….lol
DIY Bathtub Caddy/Planter
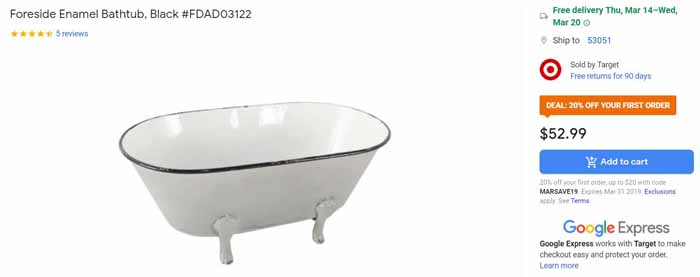
I have seen these cute little Bathtub Caddy’s everywhere and gosh they are so expensive. I mean, yes, this is bigger and is enamel but still, not a price I want to pay. I also seen one at Michaels a few weeks back and that was $30 and still too much!
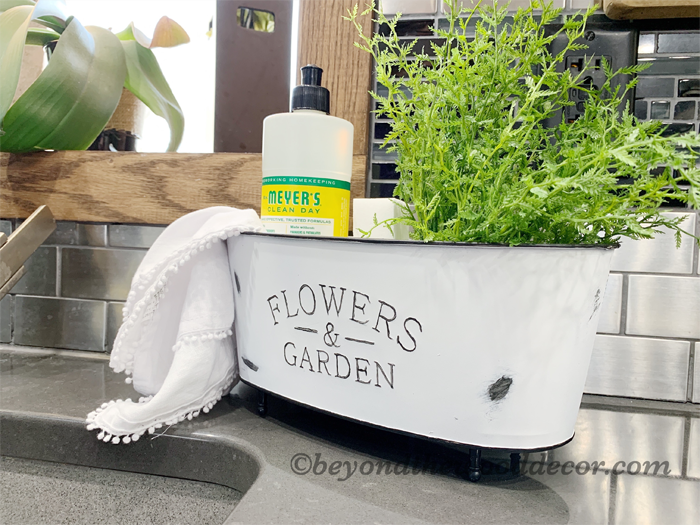
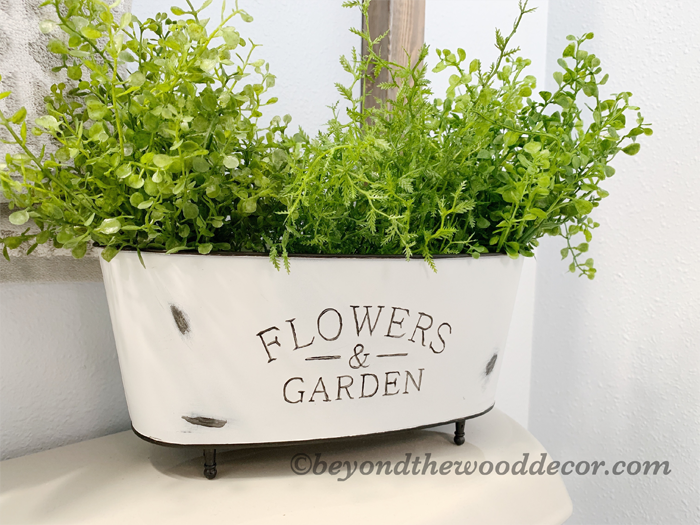
So frugal myrtle was once again at the Dollar Tree last week and I spotted these basic metal planters. What struck me was its shape which was just like a clawfoot bathtub, right?! The wheels started turning in my head. Even though I did not like the bright metal, I knew I could make it a beauty. For yes….ONE DOLLAR! Score!
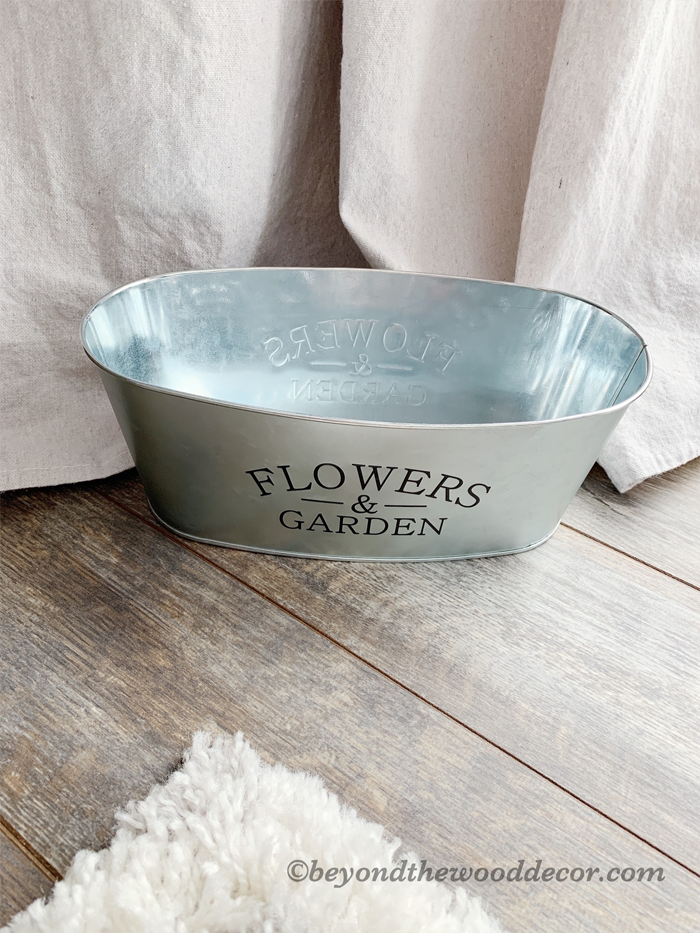
I mean who cares if it says Flowers & Garden on it, its kinda farmhouse style so right up my alley. lol. I proceeded to walk down the toy aisle because you know you cannot leave the Dollar Tree without buying the grandkids something, right?!
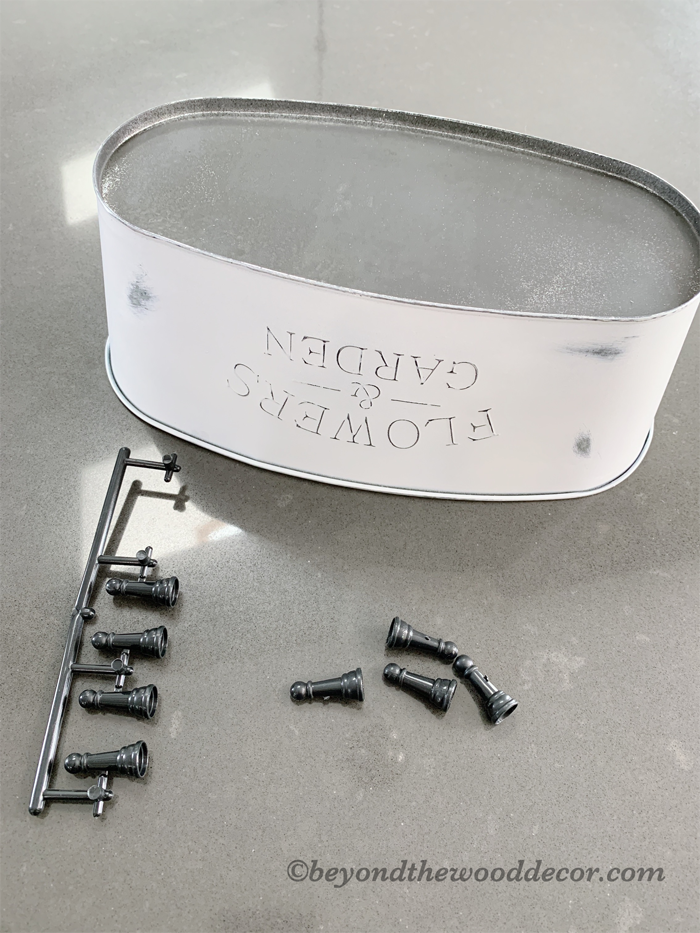
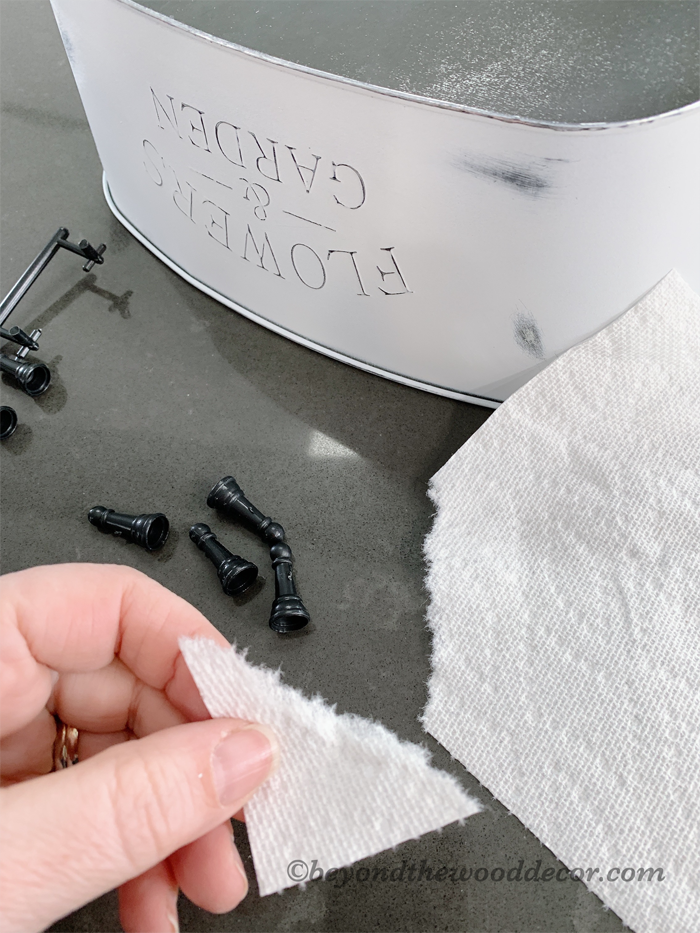
There was a chess game that was open and all the pieces were scattered about. Well they struck me as little feet to a clawfoot bathtub so of course a new unopened box came home with me, too!
I was excited to spruce this baby up and see what I could do with it and oh my gosh it was better than I envisioned. But I did learn many things through trial and error. So to save you from the mistakes I made I will share the process.
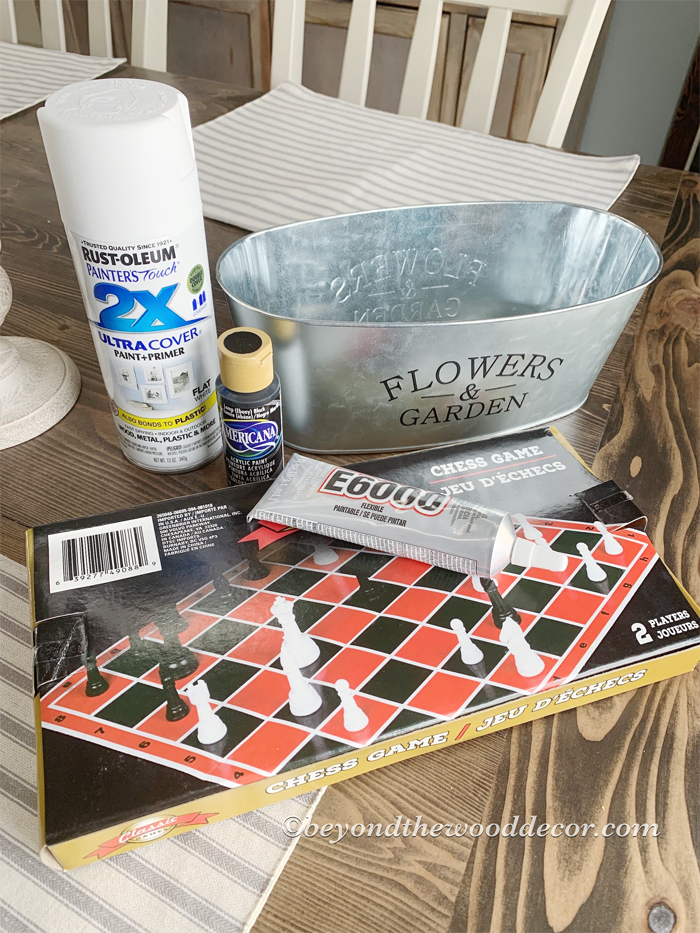
Supplies Needed
All you need for this simple DIY is just a few things…
~Dollar Tree metal planter
~Dollar Tree Chess game (optional)
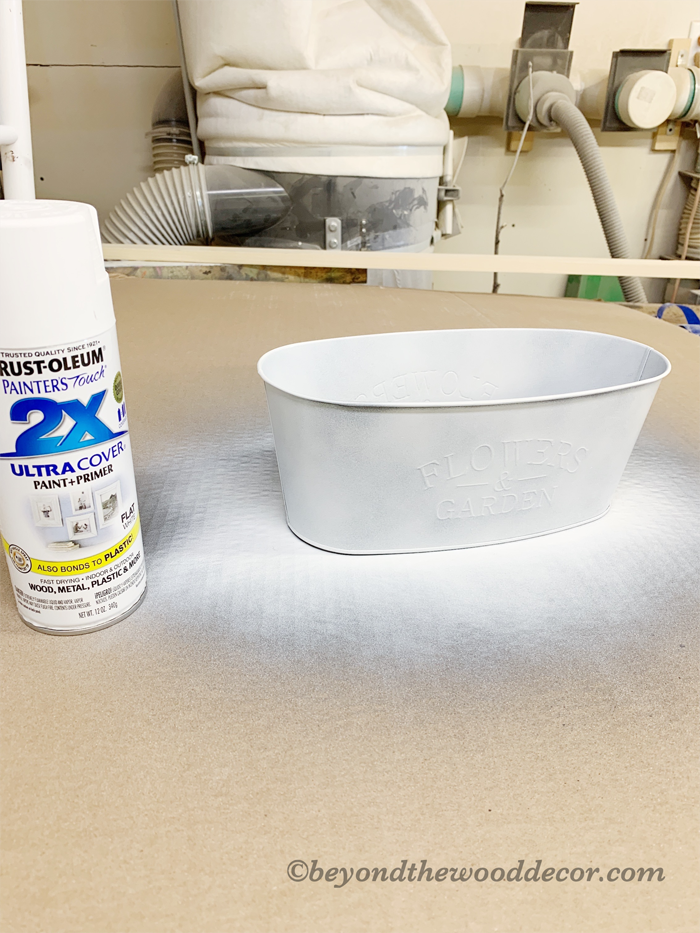
~White spray paint
~Black paint
~E6000 glue
Steps to make your caddy/planter
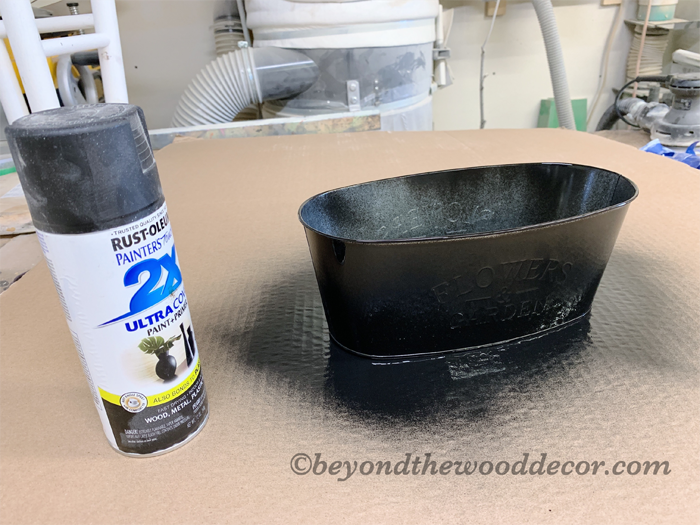
My first thought was I will want a white tub but I will want to distress it and have the black really show through and not just the metal. So I started off with spraying the planter black. But in the end, I learned you can skip that step completely and I will explain why later.
Once that was dry I sprayed it all white including the inside. It did take two coats.
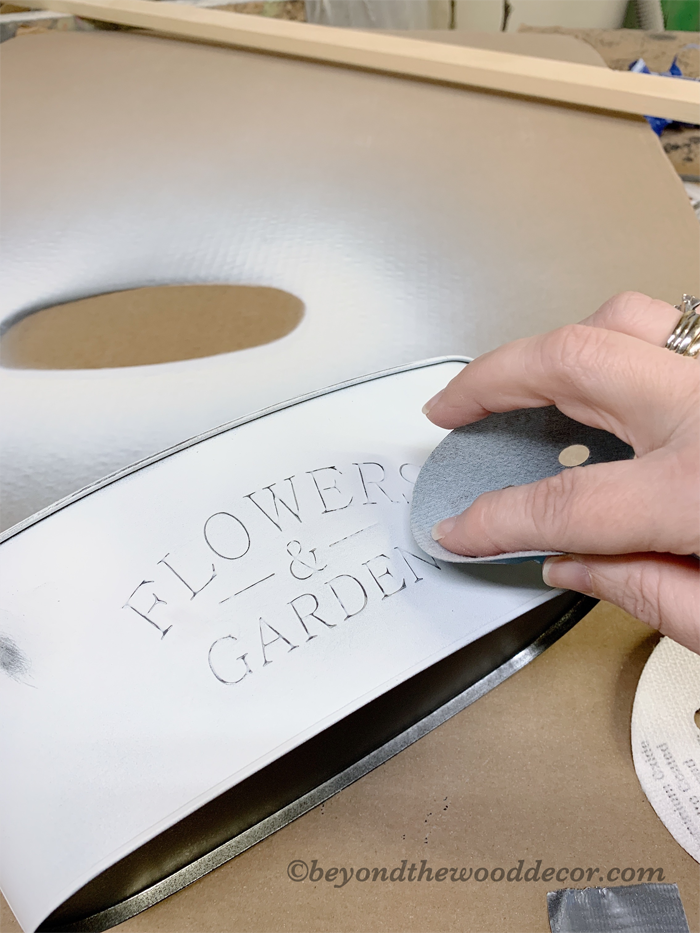
I let that fully dry and then proceeded to lightly sand the white off in areas that I wanted the black to show through. Such as all the letters and other areas where I wanted distressing.

Time to add feet to your tub!
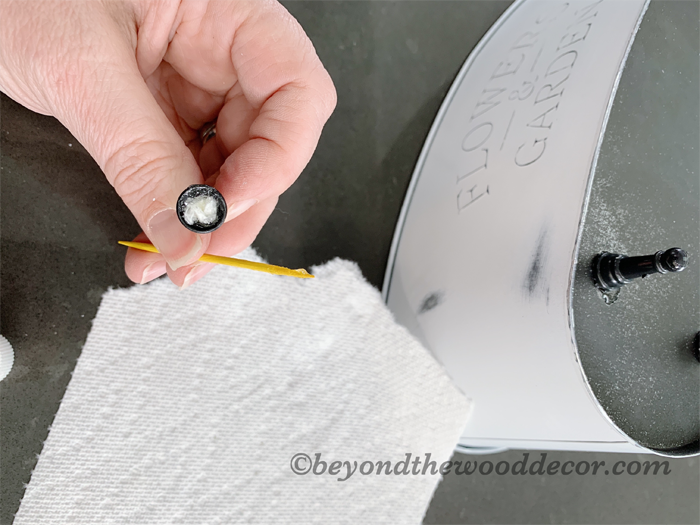
These little “pawns” (I think that’s what they are called in chess?, lol) were hollow so I knew putting glue around that little rim would just not hold it.
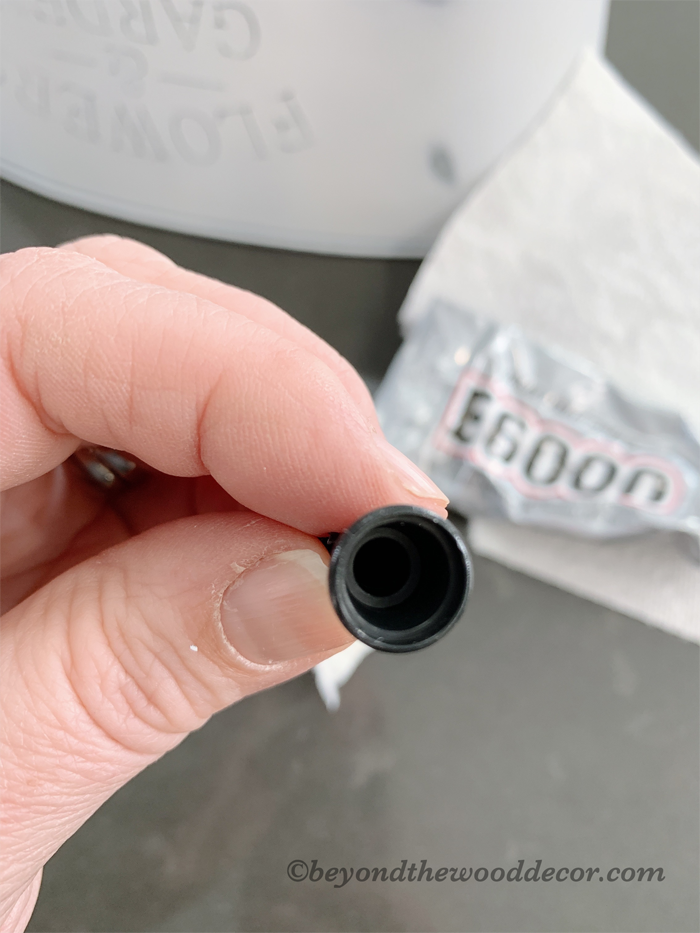
So this was my little hack. I just squeezed a little bit of my E6000 glue on the inside and then tore off a corner of paper towel and stuck that baby in there with a tooth pick. It worked WONDERFUL! I added some more glue to the top of the paper towel and the rim and set it on my tub where I thought they should go.
I then let my four feet dry just a little but before they were dry I flipped it over to test the placement of the feet. I did need to move them farther out which was okay because the glue takes so long to dry so I just slid them more to the outside.
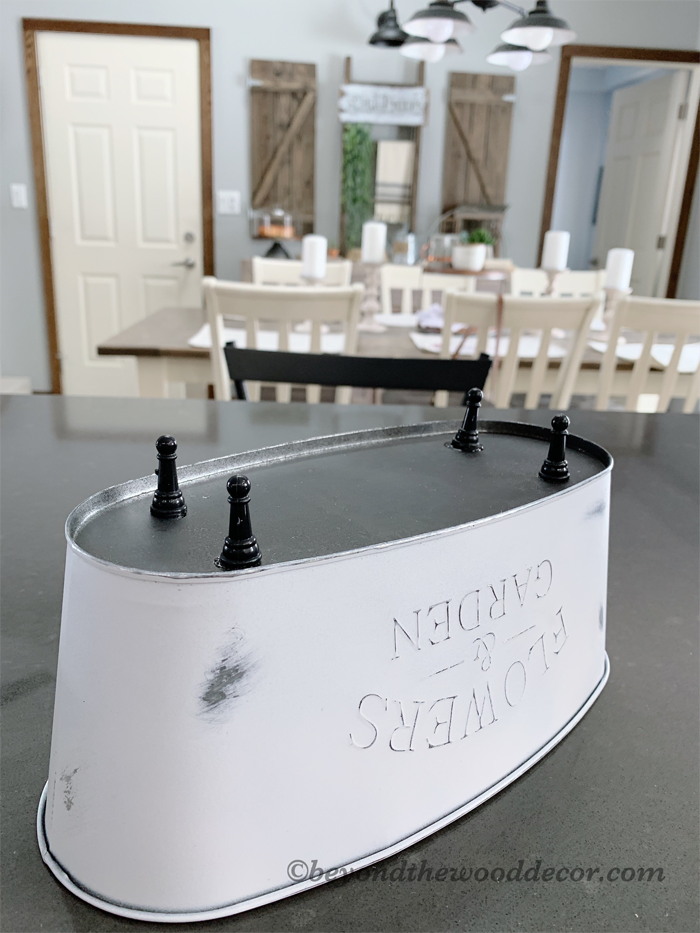
Of course you could totally skip the feet all together but on this one I did want the feet. I plan on making another one for other decor and probably will try one without the feet. But look how cute it is already!
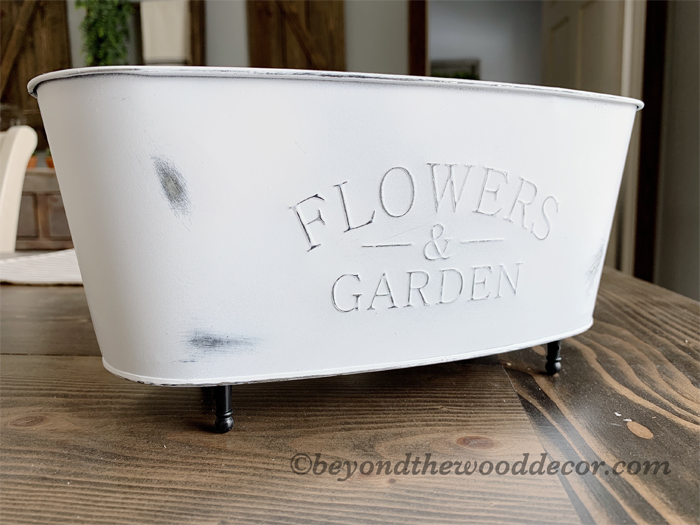
After looking at it from a distance I realized the little bit that I sanded off of the letters they were not as dark as I wanted them. Nor was the edge of the tub as black as I wanted them.
So this is where I learned….SKIP SPRAY PAINTING BLACK FIRST!
Because that was much to light and I ended up going back over the letters and areas I wanted it darker with black paint. So skip painting the black spray paint all together. Save yourself some time!
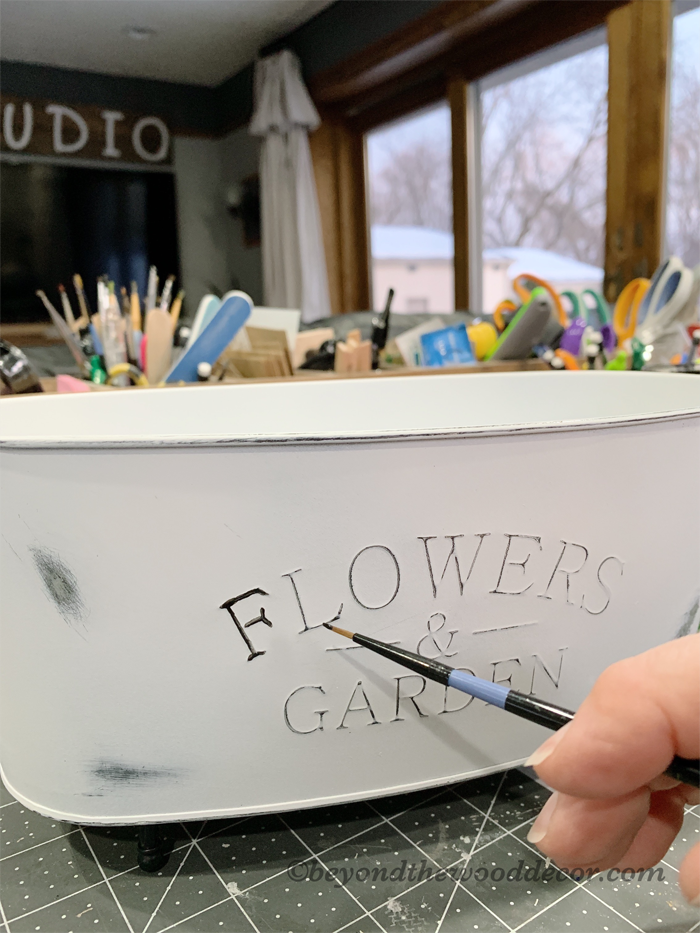
The letters are raised so you will have no problem following that outline. I used a paintbrush and paint but you could also just use a black sharpie if you would like.

I also went over the distressing areas I did with the black paint as well as the top and bottom edges of the tub.
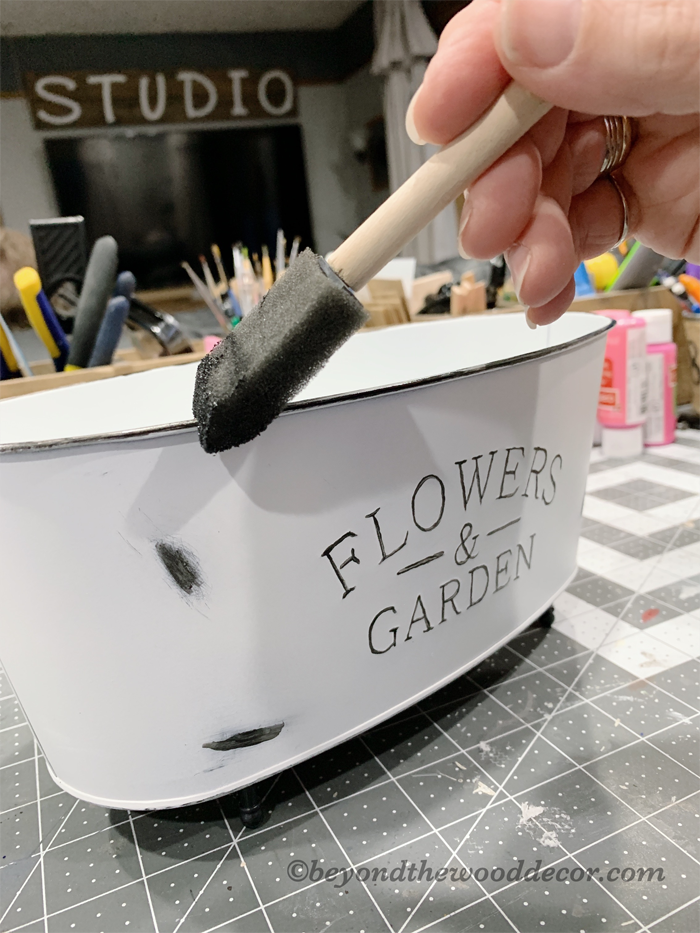
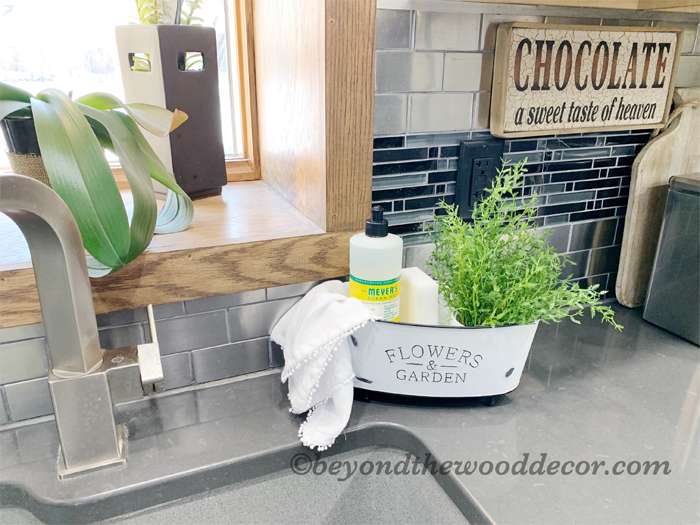
So there ya have it. So simple, so fast and soooo cute!
I mean seriously, who woulda thought for under $3 you could have such a cute metal caddy or planter.
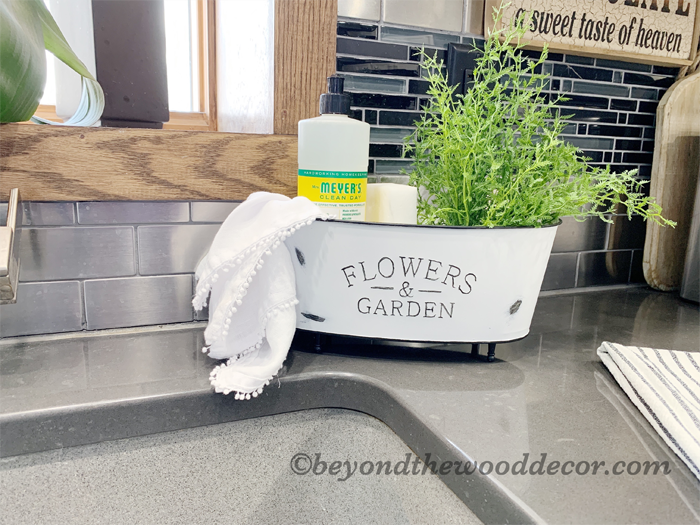
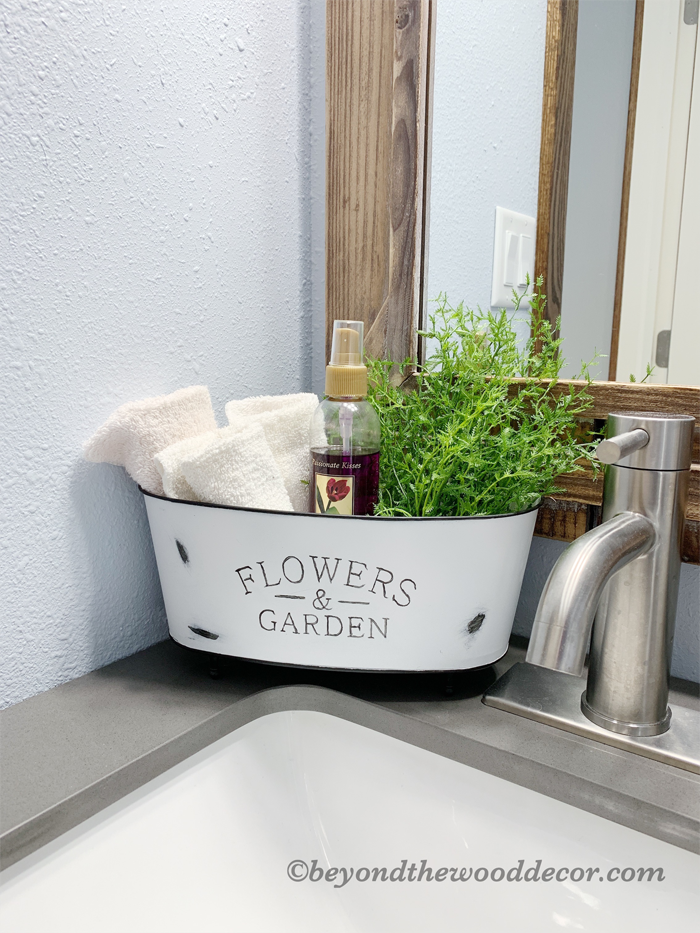
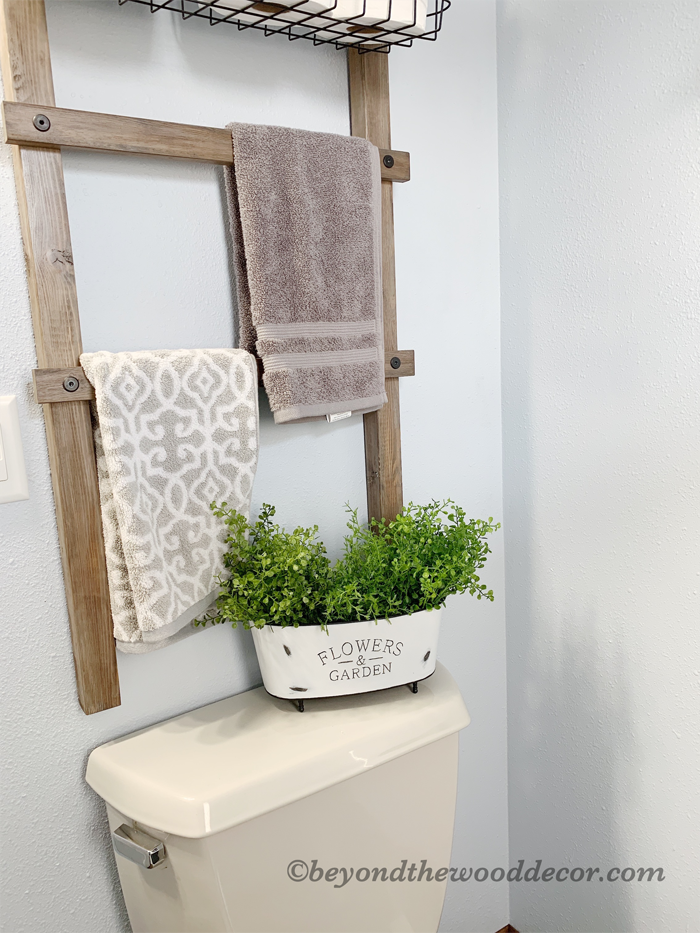
Ideas are endless how to style it. I kept mine at the kitchen sink with my dish soap in it along with a sponge and plant. But I played around with it in the bathroom which was super cute too!
Or here it is as a planter with some faux plants in it.
Since it is metal you could totally fill it with dirt and put live plants in it as well. But put some small rocks on the bottom layer for drainage. I think succulents would be perfect!
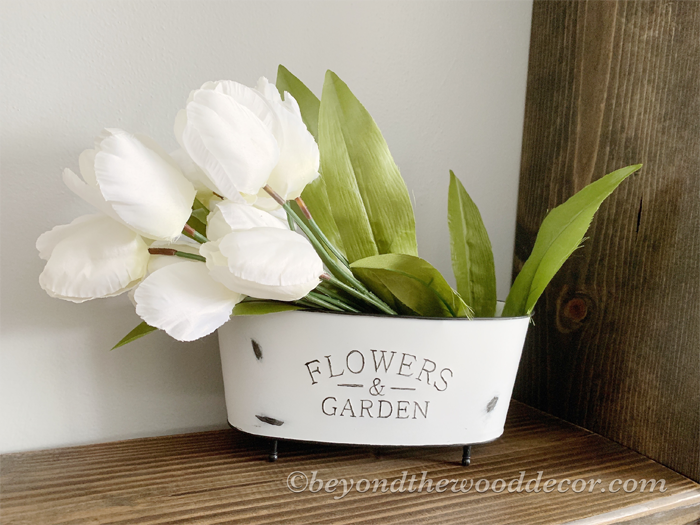
Even on a shelf in the living room with some spring tulips in it is super cute! Just so many ideas and all under a couple dollars.
I would say I pretty much scored on this DIY and I hope you will try it too! Thanks so much for hanging out with me on the blog today. I hope this super adorable DIY gave you some inspiration.
Just always keep that in mind when you find any kind of bright metal buckets that you wish were a different color they certainly can be spray painted so easily!
As always, I love your comments below and would love to hear if you plan on making one and how you might decorate it!
In closing….remember today is daylight savings time so we SPRING AHEAD! So before going to bed set your clocks ahead and yes, we do lose 1 hour of sleep, boo! But bright side it will stay lighter, longer! YAY!
XoXo


Oh this is FANTASTIC I love it. But I seriously do not have one bone in my body for being crafty but I do think I could do this and I am excited to try. Thank you for sharing your talents.
You are very welcome Stephanie and I am certain you can do it as well. Good luck! Thank you for the comment I truly appreciate it!
Hi Tammy! I LOVE it! Off to the Dollar store tomorrow to see if ours carries the planter. I love that you share your ideas and talents with all of us! Thank u so much!! Have a great rest of your weekend! Dove mint chocolates, yum! 🙂
Oh Sue you are very welcome. We have two Dollar Trees here in town and both of them had them. I snatched up 4 of them. Lol. They are right in front by all the spring stuff and florals. Hopefully you find some, it was so easy and fun. Good luck!
Absolutely love this idea!! You are so creative!! I can’t wait to try this myself 😊
Thanks so much for sharing❣️
Sandy
Love all your ideas and changes! Congratulations on your newest family addition, how precious. Enjoy those adorable kiddos.
Thank you so much Shelly, I really appreciate your comments and following along!
Great idea! Thanks for the heads up on the Dove chocolates. I love mint & will have to try these!
Thank you Janean and yes, those mint swirl doves are the best. 😍